
Office 365 is a cloud-based service owned by Microsoft. Also known as Microsoft 365, this platform allows users to access a range of Microsoft Office applications (Word, Excel, PowerPoint, etc.) simply by getting a Microsoft 365 subscription. Given the usability and features of Office 365 and the convenience it offers, users are switching from their desktop-based applications, like Outlook, to Office 365.
If you want to move Outlook to Office 365, you need to also import your Outlook OST file into Office 365. OST file is generated as a local copy of your data on the server when you set up an email account in Microsoft Outlook. It creates a replica of your email messages, contact lists, and other crucial mailbox data. Whether you’re using an Exchange account, IMAP account, or Outlook.com account, OST file serves as your local cache, allowing you to edit and manage your data even when the internet is not working.
However, importing OST files into Office 365 is not easy. The process of manually importing OST files into Office 365 (Microsoft 365) is quite lengthy and complicated. For your convenience, we will be explaining the step-by-step process of importing OST data into Office 365 in this guide.
Process to Import OST Files into Office 365
In order to import OST files into Office 365, you need to start by exporting OST data to PST (Personal Storage Table) file format. After that, you need to import the PST files into Office 365 via a detailed process.
Let’s begin with exporting OST data to PST file format. Here’s the step-by-step instructions:
- Launch “MS Outlook” and choose the File option.
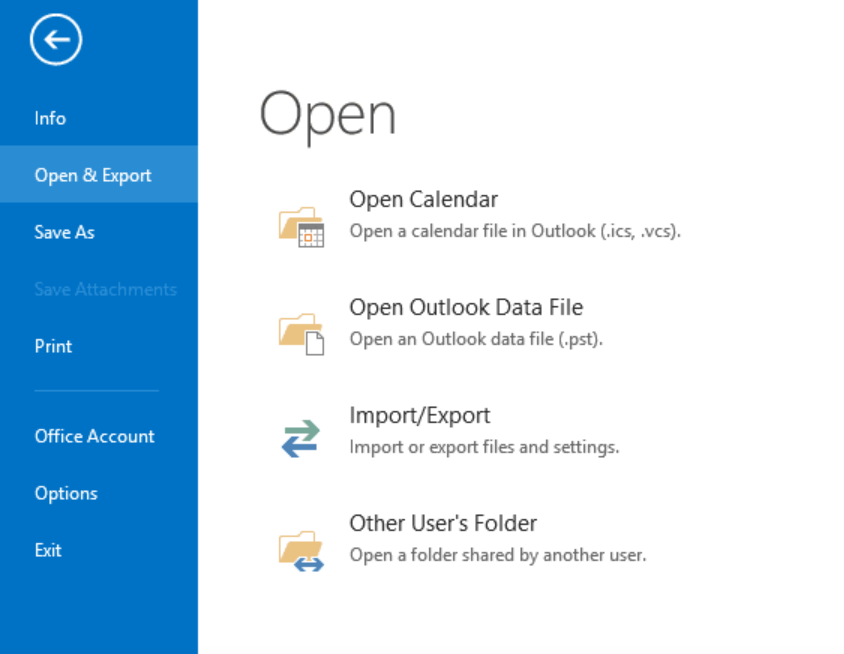
- From the left-pane menu, click on “Open & Export” and then click on “Import/Export’.
- Further, click on “Export to a file” and select “Next”.
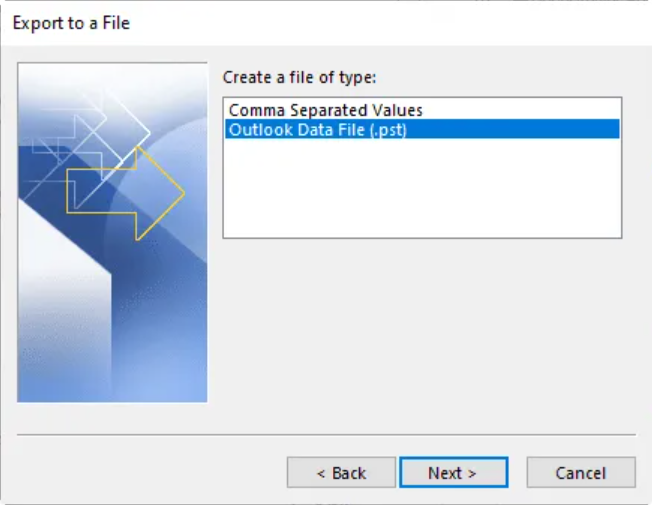
4. On the next window, under the Create a file of type section, select Outlook data file (.pst).
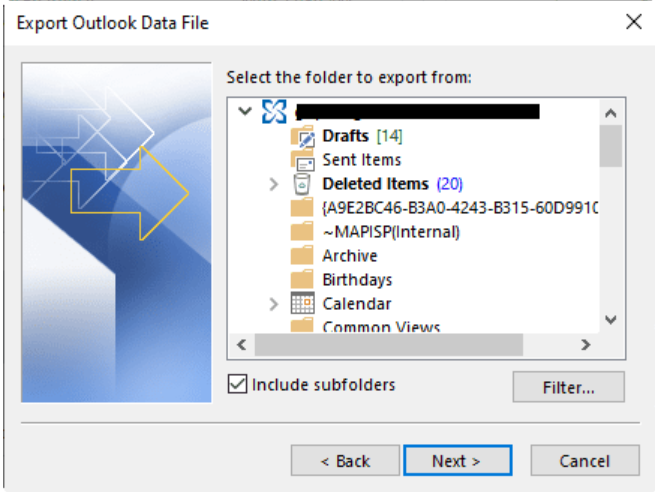
5. On the Export Outlook Data File window, select the folders you wish to export. You can select a mail account or individual mailboxes from the list.
6. Make sure to tick the checkbox associated with the option “Include subfolders” and then click on “Next”.
7. Now, select the option “Browse,” select a location to save the PST, and then click on “Finish” to complete the process.
After selecting ‘Finish,’ you may see a prompt asking you to protect the exported PST file by creating the password. If you wish to protect the file, create a password. However, if you don’t, simply click on OK and skip this step. It will begin to export the OST data to PST file format.
After completing the OST to PST export process, now proceed towards importing PST files into Office 365. Since the process is lengthy, make sure you focus on each step carefully.
Note: To export the data from an orphaned OST file to PST, you need to use OST to PST converter software. Because there are no free or manual methods to convert OST to PST file format.
Follow the steps explained below:
- Visit https://www.office.com/, click on Sign In. Use your Email/ Phone Number/ Skype and Password to login into your Office 365 account.
- Now, navigate to “Admin Center for Exchange Server” and click on the option “Permissions.”
- Further, double-click on “Organization Management.” A new window will pop up.
- Here, click on the “+” sign and select the option “Mailbox Import Export.”
- Now, click on “Add” and then click on “OK.”
- Move to the “Mailbox Import Export” option and select “Save”.
- Now, return to the Admin Center and select Setup > Data Migration.
- Click on “Upload file” and then “New Import Job”.
- Further, type in a job name and then click on “Next.” Use lowercase letters, numbers, hyphens, and underscores accordingly.
- Now, from the “Do you want to upload or ship data” window, select “Upload Your Data” and then click “Next.”
- Next, move to the Import Data page and click on “Show network upload SAS URL.” Here, make sure you copy the SAS URL that is displayed.
- Further, click on “Download Azure AzCopy” to download and install the tool.
- Move to the directory where you installed the AzCopy.exe tool and run the following command: AzCopy.exe /Source:<Location of PST files> /Dest:<SAS URL> /V:<Log file location> /Y.
- Now, create a CSV file. It is important to specify the user mailbox location for importing the PST file.
- Further, move to the Import Data Page. Here, tick the checkboxes next to “I’m done uploading my files” and “I have access to the mapping file” and then click on Next.
- Navigate to Select the mapping file window and click on the option “+Select mapping file.” Provide the CSV mapping file.
- Once done, click the option Validate. If the file name changes to green, it is successfully validated.
- Finally, select the options Save and Close to complete the process.
A Direct Way to Import OST Files into Office 365
The manual process of exporting OST data to PST file format and then importing PST files seamlessly into Office 365 is lengthy. Although the explanation above is easy, users with less technical expertise may find it confusing at some points. Therefore, a direct and hassle-free way is to use OST to Microsoft 365 migrator tool, like Stellar Converter for OST Technician. This software directly exports OST file data to Office 365 without involving much time and effort.
Here’s the quick and easy process of importing OST data into Office 365 using Stellar Converter for OST:
- On your desktop, start by installing and launching Stellar Converter for OST. Visit https://www.stellarinfo.com/ to do the same.
- Further, select the OST file (that you want to import into Office 365).
- Now, choose the Convert option. When it is done, you’ll see the data of your OST file.
- Review the data, select Office 365 as the saving option, and save the data.
Conclusion
Above, we have explained the process of manually importing OST files into Office 365. However, the process is a bit complicated and requires you to have an active Outlook profile. However, if you do not have an active Outlook profile, you can choose to use Stellar Converter for OST Technician to directly export OST file data to Office 365. Such tools can reduce time and save you from getting involved in a confusing technical process.