Many users who have recently updated their Windows PC to Windows 10 OS have been regularly complaining about the errors or bugs it hosts. One such annoying error is high memory/RAM/CPU usage after Windows 10 Anniversary Update by the system. When you download the game, despite having a good memory, the loading is stuck at a certain percentage, and the screen freezes and sometimes crashes. Several issues are leading to this error. But what is of primary concern is how to fix High CPU/RAM/Memory Usage in Windows 10.
Also Read: Fix Blue Screen after Windows 10 Fall Creators Update
How to Fix High CPU/ RAM/ Memory Usage after Windows 10 Update
Method 1- Disable Superfetch Services
Step 1: Press Windows key +X simultaneously and then choose Command Prompt. Permit to run as administrator by clicking on the Yes option.

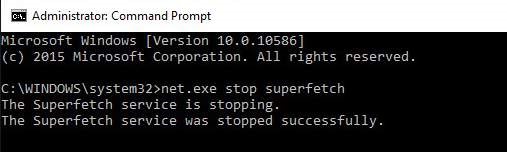
Step 2: In the Command window, type net.exe, stop superfetch, and press the Enter key.
Wait for a few minutes to observe a change in the system’s performance. You can also ensure the same by performing a disk check. To do so, follow these steps-
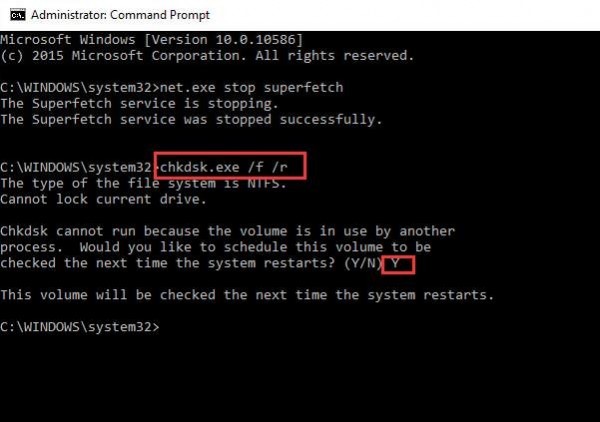
Step 1: Type the following command in the command prompt window and press Enter key.
Chkdsk.exe /f /r
Step 2: To confirm disk check, enter Y. Press Enter.
Now again, check if the issue is resolved. If not, then move on to the following method.
Method 2- Disable Certain services to fix High CPU Usage
Sometimes certain services also trigger high disk/ CPU usage. Disabling them can also help to resolve the issue.
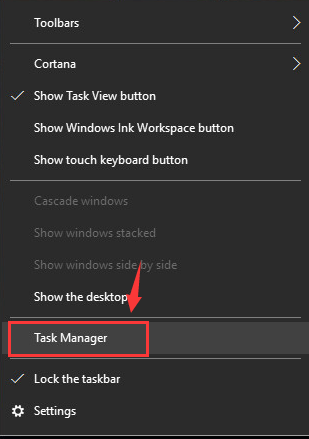
Step 1: Open Task Manager > expand Service Host: Local System.
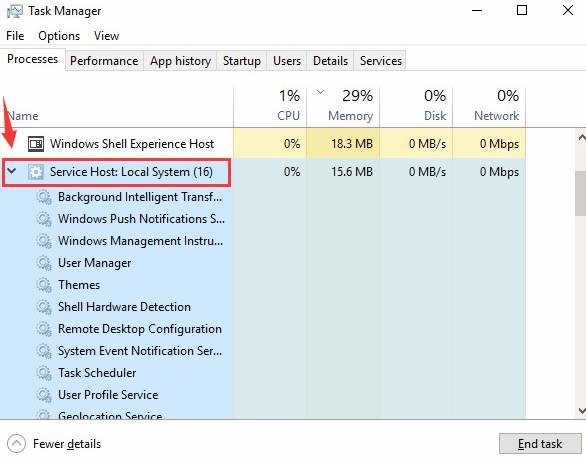
Step 2: Check CPU.
Step 3: Select one of these items >End Task. Repeat the same steps for other services.
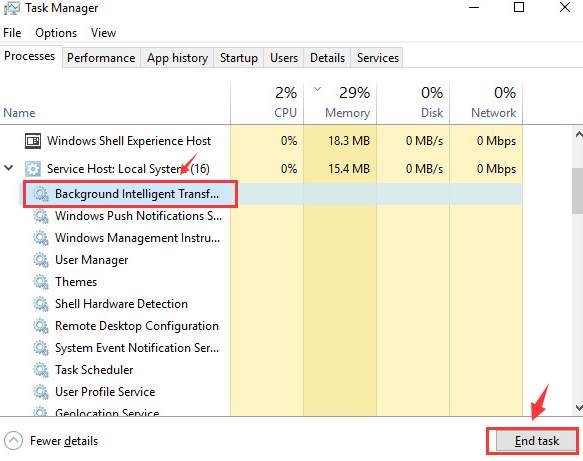
Step 4: Right-click on the suspect > choose Open Services.

Step 5: Right-click > Stop.
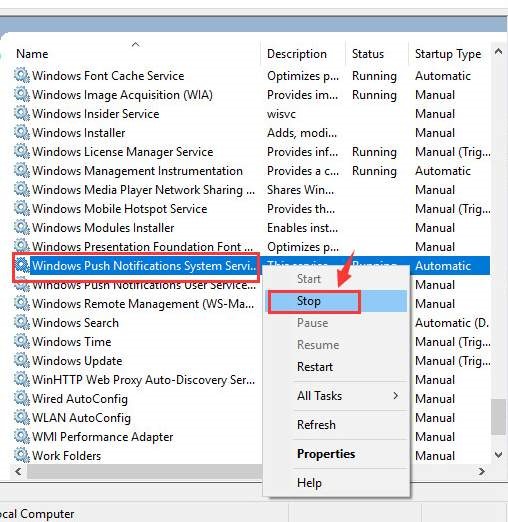
You can then disable the concerned service if you feel it is the culprit leading to high RAM usage after the Windows 10 update.
Method 3- Via Registry Hack, fix High Disk Usage Issue
This registry hack can help you fix high disk usage in Windows 10/8.1/8.
Step 1: Run > Regedit > Enter.
Step 2: Navigate to,
HKEY_LOCAL_MACHINE\SYSTEM\CurrentControlSet\Control\Session Manager\Memory Management
Step 3: Change Clear Page at shutdown to 1.
Step 4: Reboot.
Method 4- Adjust for Best Performance
Step 1: Right-click on My Computer or this PC.
Step 2: Choose Advanced System Settings > System Properties > Advanced.
Step 3: Click on settings > mark Adjust for Best Performance >Apply > Ok.
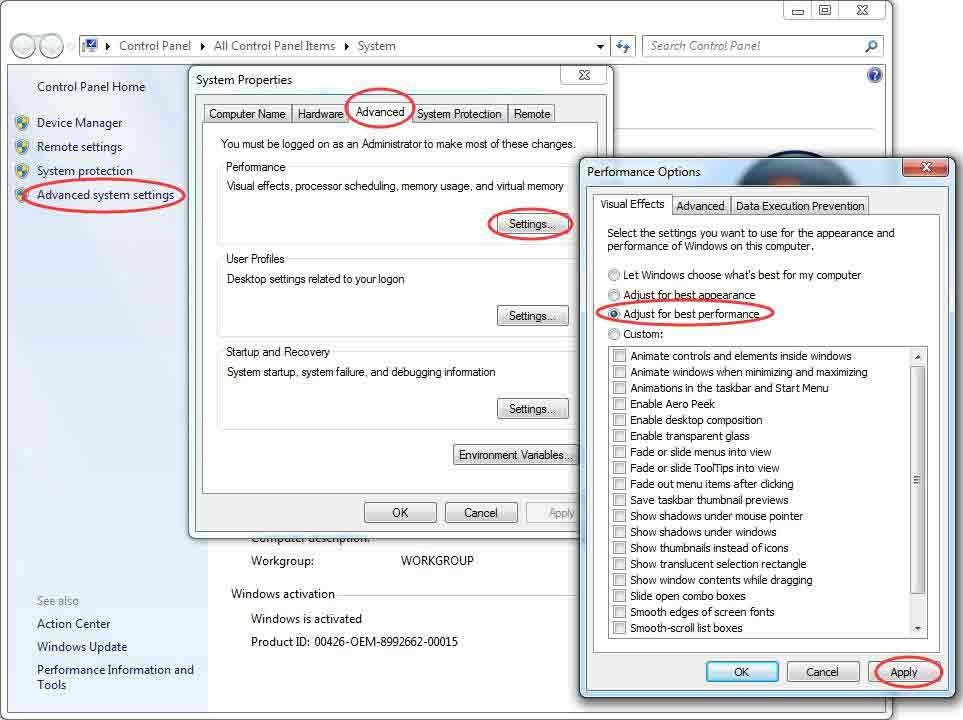
Restart PC.
Method 5- Disable the Programs Running at Startup
Step 1: Open the Run > msconfig > Enter.
Step 2: Click on the Startup option > Task Manager.
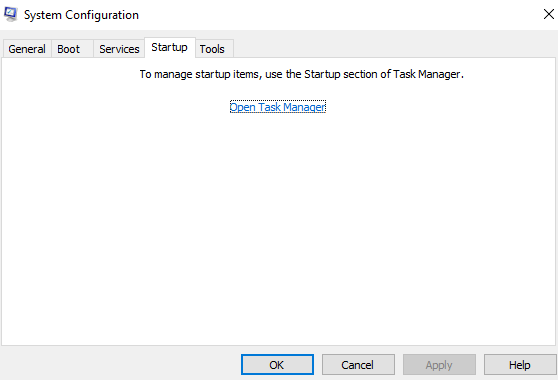
Step 3: Select the programs that you don’t want to run > Right Click > Disable.
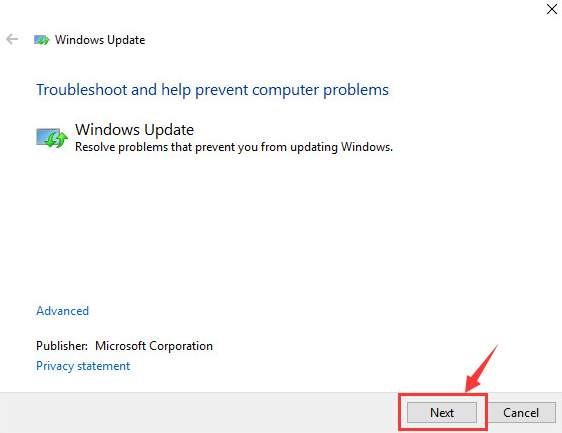
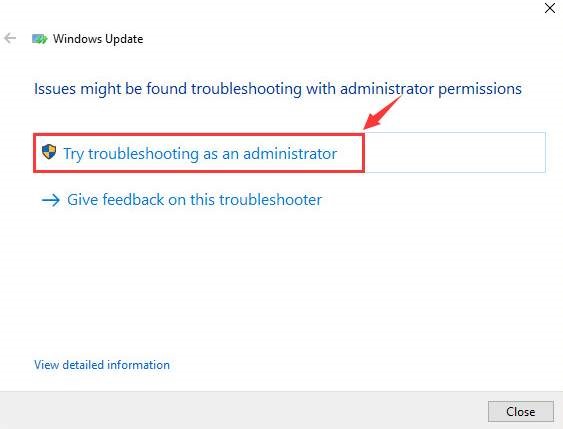
Method 6- Windows Troubleshooter Tool to fix High Disk Usage
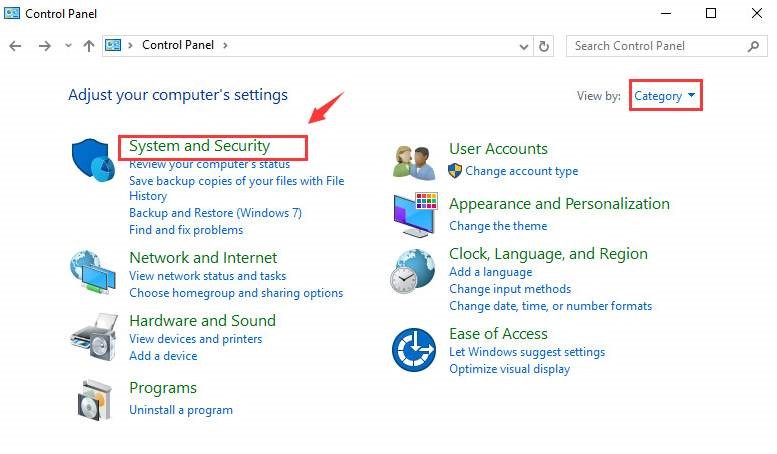
Step 1: Open Control Panel > System and Security.
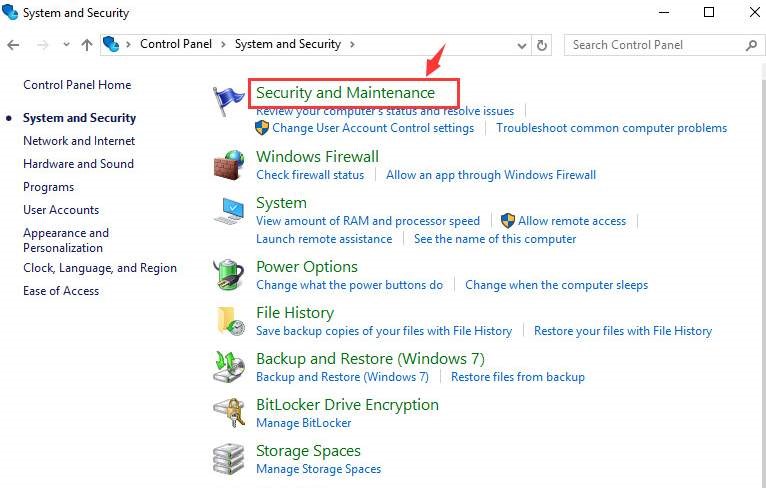
Step 2: System and Maintenance
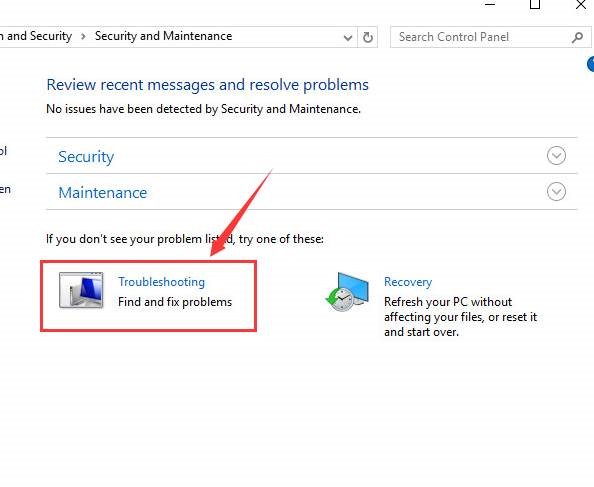
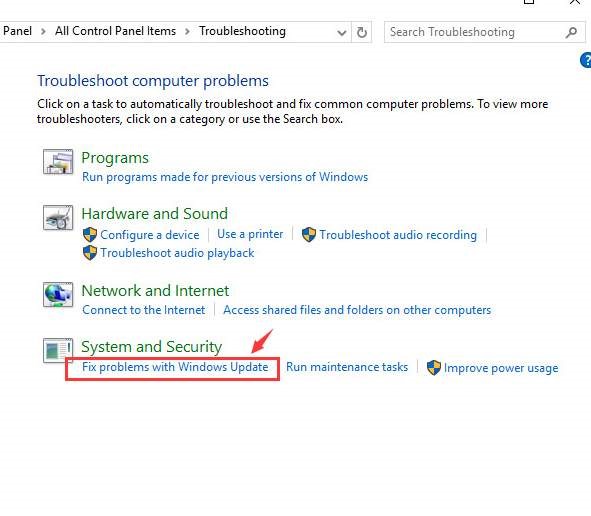
Troubleshooting > Problems with Windows update > Next> Troubleshooting as an Administrator.
This will help you fix the issue. Restart system.
Method 7- Fix Driver Issues Manually
Sometimes outdated or damaged drivers will cause High CPU/ RAM/ Memory Usage after Windows 10 Update. So by installing or updating old drivers, you can fix this issue. You can download drivers manually or use 3rd party tools to download and install drivers on your Windows 10.
Method 8- Defragment Hard Drives
Another method you can try is the defragment of hard drives, for the error may also be linked to hard drive issues.
Step 1- Open Run box and type dfrgui > Enter.
Step 2- Click on the hard drive for defragment > Optimize to start the process.
Step 3- Once it is done, restart the computer.
Method 9- Scan your System for Virus
Use the default Microsoft Windows Defender Antivirus tool or 3rd party antivirus software to find and remove unwanted files and viruses on your computer.
I hope now the error is fixed. If not, then perform a clean Windows installation and then try again. I hope you liked this Windows 10 guide. Comment for more issues.