
If you are using Windows Operating System, you know that we can access Display Settings From Desktop > Right Click. We can have display settings. Now, if we want to change/ Remove Display Desktop Context Menu on Windows 10, we have a couple of options. You can also create a custom Desktop Contex Menu by using this method.
Choose Delete to take out the key. If you click the first option, search automatically for updated driver software, and ensure you are joined to the net. If one uses multiple software alternatives to handle all those financial tasks, unwanted work is nearly guaranteed. There’s no option to delete or substitute the shortcut for something different.
Add Display Desktop Context Menu in Windows 10
The fundamental idea is straightforward. It ought to be simple to comprehend. Therefore, exporting the QuickBooks report to Excel will be the ideal option to find this functionality and manipulate the data according to the need. To begin with, let’s have a peek at how to bring the customization choices.
Recommended: Fix Razer Synapse Not Working on Windows 10
First, let’s look at how to add the customization options.
Method 1- Add NVIDIA Control Panel to Right-click Context Menu
Step 1- Open Run > control.exe > Enter
Step 2- View Small icons.
Step 3- Click on the NVIDIA Control Panel.
Step 6- Go to Desktop > Add Desktop Context Menu.

Method 2- Add AMD Graphics Properties to the Desktop Context Menu
In this next method, you can add AMD graphics using the following steps-
Step 1- Open Command Prompt (Admin) > Type regsvr32 atiacmxx.dll (for 32-bit computer).
For 64-bit PC- Type the command cd \windows\syswow64 > then type regsvr32 atiacmxx.dll.
Step 4- Enter.
And this AMD graphics option has been added.
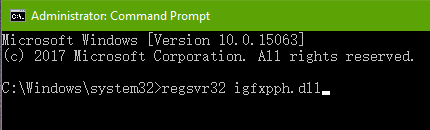
Method 3- Add Intel Options to the Menu
Step 2- Command Prompt (Admin) > Type regsvr32 igfxpph.dll or regsvr32 igfxsrvc.dll.
Step 4- Enter.
Method 1- Remove AMD or NVIDIA graphics using Registry
Step 1 – Open registry from Run > type Regedit.

Step 2- Navigate to-
HKEY_CLASSES_ROOT\Directory\Background\Shellex\ContextMenuHandlers\

Step 3- Right click on the graphic to delete > choose to delete.

Method 2- Remove Display Settings and Personalize
Step 1 – On the Registry Editor > navigate to
HKEY_CLASSES_ROOT\DesktopBackground\Shell\
Step 2 – Right click on Display > Permission.

Step 3- Advanced.

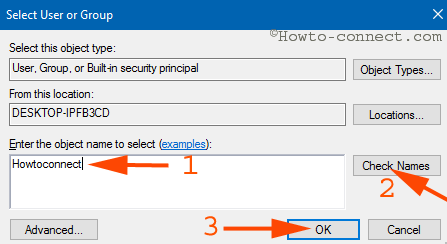
Step 4 – Click on Change adjacent to Owner.

Step 5 – Write the Administrator name > Check name. Once the name is verified > Ok.
Step 6- Apply.
Step 7- Click Administrator > Allow and Row Full control.
Step 8- Now Apply and OK.

Step 9- Now right-click on Display registry > choose Delete.
That’s it, and you are done with adding and removing the display desktop context menu on Windows 10. Follow the steps mentioned, and you will have no problem executing them.